Featured

Welcome to Matts Mountaineering

My name is Matt and I am a climber, mountaineer and adventurer.


This blog is here as a way for me to get my name out around the place, and for people to start noticing me hopefully. It is also a way for me to keep a record of my adventures and help push my career in the right direction. My big plan in life is to be able to make a living out of adventure and out of being surrounded by mountains as much as is humanly possible. But I’m not sure how… yet.


This blog was the Idea of a few of my friends who have helped me work out not only what I want to do but to help me work out the best way to start to do it. You know who you are and if you read this, Thank you for believing in me.

P8240108.JPG

Seven Summits, Mount Elbrus, Training day 1

Last Wednesday, Alex and I kicked off our training and kit preparation to begin the long journey towards climbing Mount Elbrus and eventually the Seven Summits.


As some of you are aware the Seven Summits is a dream I have had for a very long time, ever since I started mountaineering, a dream that both Owen, before his accident and Alex both shared with me. Me and Owen set out to prove that the Seven Summits, while a huge mountaineering challenge is not reserved for those big famous mountaineers and can be achieved by regular people willing to put in the time, effort and money to make it work.

As I have mentioned before all of my Seven Summits posts, leading up to the climbs and of the climbs themselves are going to serve as a place to put down all of my research and planning for everyone to be able to access them. It is worth mentioning now that THESE ARTICLES ARE NOT A TRAINING MANUAL, THEY ARE NOT DESIGNED TO GET THE AVERAGE PERSON FROM CLIMBING THE STAIRS TO CLIMBING THE SEVEN HIGHEST MOUNTAINS ON EACH CONTINENT. THEY ARE GOING TO BE PURELY INSPIRATIONAL AND A WAY OF DOCUMENTING MY OWN TRAINING, EXPERIENCES AND IDEAS. IF YOU WISH TO ATTEMPT THIS CHALLENGE OR INDEED CLIMB ANY MOUNTAINS THEN PLEASE, SEEK PROFESSIONAL INSTRUCTION TO GIVE YOU THE ABILITY TO GAIN THE EXPERIENCE TO ACHIEVE YOUR GOALS. 


Before we begin our journey and start training properly for it we needed to work out where our fitness stands and to see if we are being to optimistic.

On Wednesday our training started with us doing the South Wales Three Peaks; The Sugar Loaf, The Blorenge and Ysgyryd Fawr. These three mountains sit around Abergavenny so gave us a good chance to complete a circuit of the town and test ourselves. The idea of this was that we would walk a similar distance we would travel on summit day of Mount Elbrus carrying the same kit we plan on taking with us. This would not only show us if we could manage to walk the distance but also if the kit we had was fit for purpose and what we need to change to save weight. At the start of the day We both were carrying around 15kg of equipment including water and food.

The kit we each carried is pictured below I will do a separate post listing the equipment.

28511429_1673836339321096_358358248_n

Our day started with us planning on climbing Ysgyryd Fawr to the North East of Abergavenny, We walked accross to it and headed directly up the South East face to get to the ridge on top the quickest way possible. We set ourselves the aim of being on the summit two hours after we set off. We made it in one and a half hours. So far so good.

28512683_1673836382654425_1432614736_n
On the Summit of Ysgyryd Fawr

From the Summit of Ysgyryd Fawr we dropped off the North face down into the valley between that and our next objective the Sugar loaf. once we reached the base of the mountain we headed up the side onto the eastern most spur of the mountain. From there we headed towards the last climb before the summit and headed directly up the east side of the summit. Our goal for this was six hours, we reached this in five hours, just in time to see the sun set.

28511345_1673836369321093_1197695019_n
On the Summit of The Sugar Loaf
28511382_1673836322654431_1889545093_n
‘Gods Fingers’ as seen from the summit

28450437_1673836349321095_2139806007_n

On the summit we quickly got ourselves ready to continue in the dark. Donning down jackets and head torches we headed on down the mountain as quickly as we could, our last test the Blorenge looming ominously above us. We headed down through three small villages and across the Canal to the bottom of our last test. This took us longer than we thought and had to make the toughest decision a mountaineer can take and turned away from our last test. This decision was not taken because we were not fit enough to climb the last mountain of the day but we started the day later than planned and were relying on getting the train home so had to make it in time to catch the last train.


From this first test we both realised that even tho it was a hard day we are both alot fitter than we thought we were and now can focus on improving this fitness even further and enhancing our technical skill set.

top of sugarloaf

Cheers guys, thanks for reading

Burf


Mountaineering book recomendations

Today’s post is the first of a series of posts about getting into the mountains, and how to do so safely. This post is going to highlight some incredibly useful books from a technical point of view.

The first 3 books are all Recommended reading on any mountain related courses you will do in the UK and are seen as three of the best books of their kind.

The green book, ‘hill walking’ covers many great topics such as getting around in the hills, how to move around the hills, how to navigate, including reading maps and using compasses and GPS systems, What to wear in the mountains in summer conditions, and also living in the mountains. As well as this it covers things like how to interpret the weather and forecast for what it should do for the day, how to manage groups of people on the hills, hazards and risk management and lastly how to deal with any incidents that could occur including some uses for a rope.

The red book, ‘Rock climbing’ covers more rock climbing type things, how to set up an anchor, how to abseil, how to lead climb, elements of scrambling including equipment and how to use it.

The blue book, ‘winter skills’ Covers those things not found in either of the other 2 books, elements of winter equipment such as crampons and different types of ice Axes, it describes the layer approach to clothing in much more detail, it also covers moving in the snow, ice climbing and different sorts of anchors for all sorts of eventualities.

27781673_1649572835080780_1010033049_n27583921_1649572845080779_291267868_n27658703_1649572831747447_764253543_n

The next book is Mountain-craft and Leadership by Eric Langmuir, again this is seen by many people as the best book for any mountain leader to own, this book covers everything on the mountain leader syllabus, such as being in charge of a group on the hills, monitoring the weather, risk assessments both pre made and improvised on the move, problem solving and again rope work in the hills.

27659139_1649572821747448_1604383512_n

‘The International Handbook of Technical Mountaineering’ pictured bellow, is an encyclopedia of mountaineering techniques covering an astonishingly wide variety of topics from the many different knots mountaineers should know, to crossing glaciers and travelling linked together by a rope. It also includes techniques for bigger mountains such as how to set up and use a fixed rope both in ascent and descent and also how to set up more varied things such as a Tyrolean traverse, a way of spanning a rope across a gorge or canyon etc to get from one side to the other.

27781553_1649572841747446_1117218749_n

‘Mountaineering the freedom of the hills’ and ‘Mountaineering’ are the definitive guides and are seen by many people with a mountaineering background as the bibles of mountaineering. They just like the technical mountaineering book mentioned above covers a wide variety of topics and skills however do so in a lot more detail. ‘Mountaineering’ is split into sections such as walking, rock climbing, winter mountaineering and Alpine techniques.

27721214_1649572795080784_1415280617_n27721417_1649572811747449_248546322_n

All in all these books mentioned are the best mountaineering books I have read, all are good at their own thing, my most used books from a mountaineering and walking perspective are the freedom of the hills and Technical mountaineering. These books, however good are not in any way a replacement for proper instruction or training.


Cheers guys, happy reading…

Burf

New mountain, New climbing partner…

Yesterday I climbed what may well be my new favourite British Mountain. Waun Fach is the second highest mountain in Southern Britain (Pen-Y-Fan being the first).


We started the day From the Dragons Back pub car park. From here we went up onto Castel Dinas, the oldest Hill fort in England and Wales.

Castel Dinas new (Blog)

From here we went up the Dragons back, a long ridge running from the base of the hill fort up to the main path leading to the summit. This part of the walk was amazing, on the way up we stopped and looked back and could see the whole of the Brecon Beacons and Black Mountains national park.

27495957_1645689565469107_480013938_n

Above: The Dragons Back ridge.

3

Above: The view from the ridge.


From here after the weather closed in a little and we were experiencing high winds and snow, we made the decision to adjust the route slightly and head over the main ridge of the mountain and get into out of the wind a little. The views from the top  of this ridge were outstanding.

27661703_1645689558802441_198958276_n


From here the route was very straight forward heading up to the summit of Waun Fach itself.

7


After posing on the summit for photos we headed down a small scramble and into a Saddle on the mountain before heading off and down the side of the face before heading back towards Castel Dinas and finishing the walk. this final hill was the hardest one I climbed all day.

27583461_1645689682135762_1656753173_n

27653571_1645689128802484_438348243_o

Above: A panoramic photo showing the route we followed starting on the small hill on the left which was the Castel, then along the ridge you can see in the middle onto the large rise you can see in the middle, across onto the summit of Waun Fach on the right, then along the path you can see leading into the foreground.


All in all, it was a very successful and enjoyable day with a lot of differing weather conditions, including Wind, snow, hail and sun. I can highly recommend this walk!


Cheers guys, thanks for reading.

Matt

The Seven P’s Part 3, Surviving it.

The most important thing about being a mountaineer. Being prepared and being able to survive in an emergency situation.


Most mountaineers I know and have spoke to will carry some form of emergency kit, you know, in case of an emergency. These kits have many different names my personal kit is split into 2 main categories, Everyday Carry (things I take up every mountain with me regardless of what it is or what the weather is). Survival kit (These items are packed on an as I need them basis, this kit will be different depending on the size of the hill, the distance from roads and other people, the expected weather and the season etc).


Everyday kit.

The everyday kit I carry is things like waterproofs, spare water, extra food, spare clothes (spare micro fleece at the very least), emergency shelter, hat, gloves and a buff, I also always wear a riggers belt when I am in away, this belt is made of tough materials, with a large fold back Velcro section to close it. It also has a metal loop on the front of it that in an emergency can be used to abseil off or belay people from. Whatever bag I choose take with me always has a whistle attached to the chest strap. I always carry a map and compass when in the hills regardless of the weather or how well marked the route is, it is very easy to get lost in adverse weather conditions, to go with the map and compass I always carry a set of ‘ranger beads’ these are something I picked up in the army and is a piece of para cord with some beads threaded onto it, these are used to count the distance you have travelled so you can always know how far you have walked even if you cant see where you have come from. This is especially useful at night or in foggy/ snowy conditions. I also always carry a head torch just in case. I always carry a first aid kit with me, what it contains depends on what I am doing and where but there is always one in my bag.


Pace-Count-Beads-9

First off before I move onto my survival kit and the kind of things I carry in it I want to talk about the ranger beads as they take a little bit of explaining…


To use these you need to know roughly how many paces you take over 100 meters, for most people this is around 60 paces which is a good place to start.

When you start, after walking your 100 meters move on of the 9 beads to the end               of its section.

Repeat this every 100 paces until all 9 are at the bottom.

After doing this for the 10th time move all 9 back to the top and one of the top set, 4           in this case, down to the bottom of its section.

Each one of these top beads means you have travelled roughly 1Km.


‘Survival kit’.

My survival kit is based around 3 ‘levels’ of kit.


Level 1 – kept on my person or accessible without having to take off my bag

pen knife

torch

compass

waterproof notebook

Line 1

Level 2 – Kept in the top pocket of my bag

Case

Small torch

Small knife

Ferro rod and striker

Puri tabs

Para cord

Cotton wool in a small waterproof bag

Matches

Whistle

Compass

Mirror

Pictured bellow is everything apart from the puri tabs.

Line 2.JPG

Level 3 – kept in my bag easily accessible. This kit never gets unpacked only to check the contents

Pouch

Tarp and pegs

Military grade Cylume – minimum 12 hours of light

Hexamine cooker and fuel – good quick heat and light

Matches in waterproof container

Brew kit

Emergency food

Survival bag

Sewing kit

Spare high power handheld torch.

Spare boot laces

1st aid kit

Multi tool

Knife Sharpener

Pictured bellow is everything apart from the Tarp

Line 3 packedLine 3 unpacked

My 3rd Line gear also will include mountain specific kit depending on the conditions expected examples include…

Alpine harness

Scrambling rack

Helmet

Mountaineering rope – 30m long and thinner than a climbing rope

Crampons

Ice Axe

Pictured bellow some parts of the above mentioned kit.

DSC00006


This is the main parts of my survival equipment while on a mountain, listed bellow are some examples of other people’s mountaineering survival equipment. As you will see these vary massively, most people will have most of the kit mentioned above, but they might not count it as survival kit like I do…


Example 1

Two man survival shelter,

first aid kit,

whistle,

torch x2


Example 2

Foil blanket x2
Survival bag x1
Bivvy bag x1
Food
Water
Head torch x2
Red strobing led x1
Spare batteries
Cylume stick x4
Power bank for phone
Gas lighter
Flint & striker
Lightweight stove x2
Hat, gloves & buff
Spare map
Spare compass
Spare clothes


Example 3

Water
Food
Electrolytes
Walking poles
Crampons (if icy)
Warm hat
Hooded wind proof outer jacket
Base layer
Fleece
Waterproof over trousers
Foil blanket
Whistle
Luminous snap stick
Phone
Charger/solar battery
Maps & compass
Match sticks
Spare socks
Waterproof gloves
Head-torch (just in case)
Spare batteries
Lightweight cooker
Camera


Example 4…. This one made me smile it had to make it on

Lip gloss,
hairbrush,
sweets,
selfie stick,
Spare bobble
Dry socks
Handwarmer
Codeine


Cheers guys and a thank you to all who contributed!!


Matt

The Seven P’s Part 2, doing it.

Any Mountaineer or Hill walker you talk to will have had their fair share of problems and close encounters. Listening to this advice and learning from it for most people is worth more than its weight in gold. Making a mistake once, that’s OK if you learn from it, but never make the same mistake twice, then you are just being foolish.

This article is going to explore a few scenarios. Each will be presented in four identical ways: The scene; where is this, when, what is the weather like. Amount of people involved. What happened. What lessons can we learn.


Scenario 1:

February, The Long Mynd, Deep snow higher up on the plateau.

Team of 3 relatively un-experienced walkers.

The team left the bottom of the valley, which was wet but no real snowy presence and headed up into the hills aiming to get to a camp site on the far side. The team struggled up a very icy slope and finally made it onto the top. Once here they found waist deep snow as far as the eye could see and everything looked the same bland white colour. After taking a bearing and setting off it soon became apparent they had walked the wrong way and were now well off the path. They accidentally stumbled upon a stream, this stream was quite deep and one of the team ended up knee deep in the freezing water. Eventually this same team member (who later turned out to be wearing jeans underneath his waterproofs) dropped with hypothermia, started shaking, struggling to talk and do basic things with his hands like opening pockets and tying shoelaces. The Team leader made the decision there and then that they could not get to any of the designated evacuation spots so got the team somewhere out of the wind and assessed the situation. The leader made the decision to stay with the member who was struggling with hypothermia and start trying to warm him up while the other member of the team attempted to find phone signal and call for help from mountain rescue. Giving them a six figure grid reference and a land mark. As the day progressed, the rescue team arrived after a long time. The team found out that this delay was due to mountain rescue having to also be rescued after getting stuck in the snow.

Lessons learnt:

Don’t waste time taking short cuts, especially in bad weather when you dont know where you are.

Don’t rely on others to get you off the mountain, sometimes, un-forseen circumstances mean you need to rely on yourself. Sometimes even the rescuers need rescuing.

Always make sure you know what your team is wearing, if you aren’t happy with something then say before it becomes a problem.

Learn to read a map and when using it in bad weather always get it checked before setting off.


Scenario 2.

Pen-Y-Fan Winter, lots of snow again.

Team of 2 experienced mountaineers.

The team approached the summit from the north about 1/3 of the way up, the team stopped and put crampons on and replaced walking poles with axes. the ascent went smoothly, no problems with the weather or navigation. The team reached the final small scramble before the summit and even tho crampons weren’t necessary they aided the team in climbing quickly. On the summit the team stopped for a few minutes for food and the obligatory summit photos. After this they started descending the same way they came, when they got to the top of the scramble the wind picked up creating a small isolated white out. confident they were going the correct way the team started descending, in a small break in the weather they saw they had climbed slightly off route so adjusted their route accordingly. the wind started picking up spin drift off the side of the face and blowing it into the teams faces. Both team members had goggles, but they were in their bags somewhere and unable to be recovered in the position they were in. After finally making it to the bottom of the scramble and out of the worst of the wind, they checked their route and finished the descent.


Lessons learnt.

Carry and regularly check your map, even if you think you know the route you are climbing, adverse weather conditions can make even the most well known route look different.

Carry the right equipment with you and dont let others put you off using it, if you think you need it, and it will make you feel more secure and confident then use it.

Pay attention to where you are. Don’t just wonder off in the direction you think.. CHECK

Having the right kit for the conditions is all well and good, but only if you can get to it when you need it. Plan ahead, pack ahead.


Scenario 3:

December Brecon beacons again, deep snow.

Team of two.

One team mate started showing signs of hypothermia (mumbles, stumbles, grumbles and fumbles as he put it) so the other team mate Ryan decided that getting team mate number 1 off the mountain was a priority and getting them warm. They got to the bottom and SLOWLY warmed back up. As this was happening person 2 left their kit unattended away from the car. The kit in question is always packed perfectly as mine is every time in the same way, mine works for me and Ryan’s works for him. After warming up a bit they drove off and got somewhere they could get good warm food. In this situation Ryan left his kit on the side of the mountain as his priority, rightly so was the casualty.

Lessons learnt from this:

make sure your kit is fine, packed perfectly and tidily.

understand about the weather what it can do and what it means to you on the mountain both where you are and further up.

Leave a route plan in a secure place with someone trustworthy.

How to read a map without any digital help.

Have a supply of food and warm clothing.

Don’t be afraid to turn around when you need to before you need to get external help.

Do not switch off until all people in the group are safe and secure.

Inform people at home when you get down and of any change of plan.


Scenario 4:

January, Cairngorms, Snow again

Single experienced mountaineer.

Started at Glenmore Lodge, ascended the North face of Cairngorm Mountain, After making it to the summit he decided to move west accross the ridge at Corie An T-sneachda and descend via Aladins Couloir before heading up the valley north back to Glenmore Lodge. As he got to the top of the couloir and started to descend 2 freak gusts of wind pulled him off the top, he fell down the couloir and ultimately died. There was a mountain rescue team training on the mountain near him, they saw him fall and was on the scene in minutes but to no avail.

Lessons learnt

The biggest and hardest thing to take away from this one is that even when you do nothing wrong, things can still go wrong.

The Seven P’s Part 2, Packing It.

Prior Planning and Preparation Prevents Piss Poor Performance.


This mantra has been drilled into me since day one of life in the army. In fact it was one of the very first things our training staff said to us, and its stuck in my head ever since. Failing to prepare is preparing to fail!


With this in mind, and with it being winter and snowy in the mountains, many people are heading out into it for the extra challenge and beauty this represents. This post is the first of a handful of articles about surviving in the winter environment. This post is about the way I pack my kit and what I carry every time.

The next post is going to explore some different scenarios in the mountains and what went wrong, why and how we can learn from it. After these posts I will go through what I have in my emergency kit and emergency skills that are important to know.


Packing my kit

I pack my bag the same way every time without fail so that I know where I can find things in any weather at any time.


Core kit

After much trial and error, I have fallen in love with the ‘Lowe Alpine Air-zone Pro’ backpack (pictured below.) This rucksack is a 45ltr bag which, while a little larger than many people want to use, is perfect and works for me no matter the weather or the terrain. The bag itself has very little on the outside that can get trapped or caught in things. It has a single large outside pocket with an elastic retaining strap perfect for a helmet. The bag also has a zip on the outside that allows you easy access to the inside, there are 2 elasticated pockets on the side to store water bottles or thermos flasks. Last but not least the bag has a hip belt with pockets on.

bag for blog

This bag can fit everything I could possibly need inside of it:

Each of the items stored inside are kept in different coloured waterproof bags.


The first thing put inside no matter the trip i’m on is my first aid kit. Again my first aid kit is large and designed for groups of people, it is the life systems mountain leader first aid kit. This first aid kit comes stocked with lots of mountain essentials and I have stocked it up with my own additions as well. Again it is a bit larger than most people would like but I have never been in a first aid situation and not had what i needed inside.

1st aid kit

Along side this in the base of my bag is my storm shelter from Vango. I have 2 of these, depending on the size of the group I am going up with. One has space for 4 people and the other has space for up to 8. Anymore than 8 people and I would take them both with someone else carrying one of them.

shelter

In the space between these at  the bottom in a red waterproof bag is my stove. This is useful not just for making a hot drink and some food, but can also be used as a good emergency heat source.

Next up in a green dry bag is my spare clothes. Normally this contains a micro fleece, because these are really warm and light and pack down really small. Along side this is a couple of spare pairs of socks and a pair of gloves. This is not things I would usually use but is useful if I stop for a prolonged period of time as something quick to throw on and keep warm. Normally this is used for other people in need be they in my party or on the mountain in need. This is kept near the zip on the side of my bag as I can very quickly get to this if needed.

In a black waterproof bag I keep my down jacket and I have waterproofs in an orange coloured waterproof bag. These are put in whatever order I think they are more likely to be used. If it is raining or rain is forecast then the waterproofs will be on top, if the day is forecast to be cold then the down jacket will be on top.

On the top of everything else in a blue bag is my hat, gloves and my buff. These are here as they are the things that I will be constantly putting on and taking off again.

Next to these is my Survival Kit. This kit in itself is small and varies massively on destination and need. This essential piece of equipment is entitled to its own post and will get one soon.

In the lid pocket of my bag is my GPS, which I only use in an emergency and to track my routes on days out. In the lid pocket I also keep my camera, a head torch, a spare head torch, my knife, para cord and a 1:50000 map of the area. I carry a spare torch because it’s easier to replace the whole torch rather than just the batteries, particularly if it’s raining.

In the front pocket of my bag, connected to the shoulder strap by a piece of para cord is my main map. When I am using the map it is kept in the space between my back and my bag.

The side pockets of my bag always have a water bottle and my thermos flask.

The hip belt pockets contain my compass and some snacks or kendle mint cake.


Additional equipment

These are the things I always take with me the following things are all dependant on what my day in the mountains is going to contain.

First off is my scrambling rack that is stored on my Black diamond alpine harness. This houses a few bits of climbing protection, a few alpine quick draws along with a couple of slings and screw gate carrabiners.

On scrambling days or on days that involve lots of high risk activities I carry my helmet. My helmet is a black diamond half dome.

620206_halfdome_ls_web

My default mountain rope is a 30 meter 7.5mm rope which already has a figure of 8 on a bite on it and another screw gate. This is kept flaked into a draw string bag with the knot sticking out of the top. the bag is put in right next to the zip so that the rope can be pulled out with the bag still inside the main compartment of the rucksack but it also means that it can be taken out easily if needed.

I normally carry a set of 2 walking poles, my poles have external locks on them rather than locking internally like the screw lock ones widely in use. These are kept strapped on the outside easily accessible.

In the winter when moving around I carry my Black diamond raven Ice axe and my black diamond crampons. The crampons live in their bag near the top of my rucksack so they can be found quickly. The Ice axe lives strapped to the outside.

axeblack-diamond-cyborg-crampon-heel-clip

All of this equipment is of the highest quality you can buy and have been tried and tested by myself over many years. While there is a lot here, every single piece of it is worthless unless you have the correct knowledge to use it and the experience to know when. The most important piece of equipment you can ever pack is your brain.

Lessons to take away from this post:

Know your kit, know what it can and more importantly what it can not do.

Know how and when to use everything you take. If you get something new use it and learn how it works somewhere where your life wont rely on it.

Learn how to pack your bag, and pack it the same way every time so you can find whatever it is you need in any weather as soon as you need it.


Tune in tomorrow for the ‘Seven P’s part 2’


As always guys, any questions, ask away!!

Burf.

A-Z of essential mountaineering skills

Hi guys, So after asking people the other day what else they would like to see on here rather than just endless descriptions of my trips, people would also like to have some gear reviews and the occasional technical post about a skill for mountaineering, rigging anchors for example. This post today came from a question someone asked me the other week about what I deem some of the essential skills of a mountaineer so here they are in an A-Z format.


A- Altitude: Understanding the effect altitude can have on your decision making skills is essential, knowing when your decision making skills are impaired means you can realise when it is happening and do something to keep yourself in control of it.

B- Bearing: knowing how to take a bearing can be essential, first of all it lets you know you are walking in the correct direction and also helps with walking in adverse weather conditions such as severe rain or walking in white out conditions in winter when you cannot see anything due to snow.

C- Clouds: recognising different cloud formations and what they mean for the weather you have at the moment and also what weather they can bring with it, recognising storm fronts etc can be essential in forward planning which way you are walking and when you should turn around etc.

D- Direction: knowing what is in which direction so that even when you have taken a compass direction or a bearing you should know what you are meant to be walking towards and also what you should not come accross can be key.

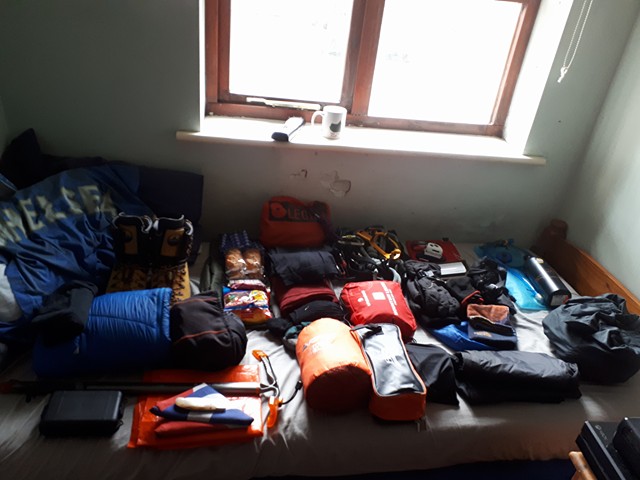
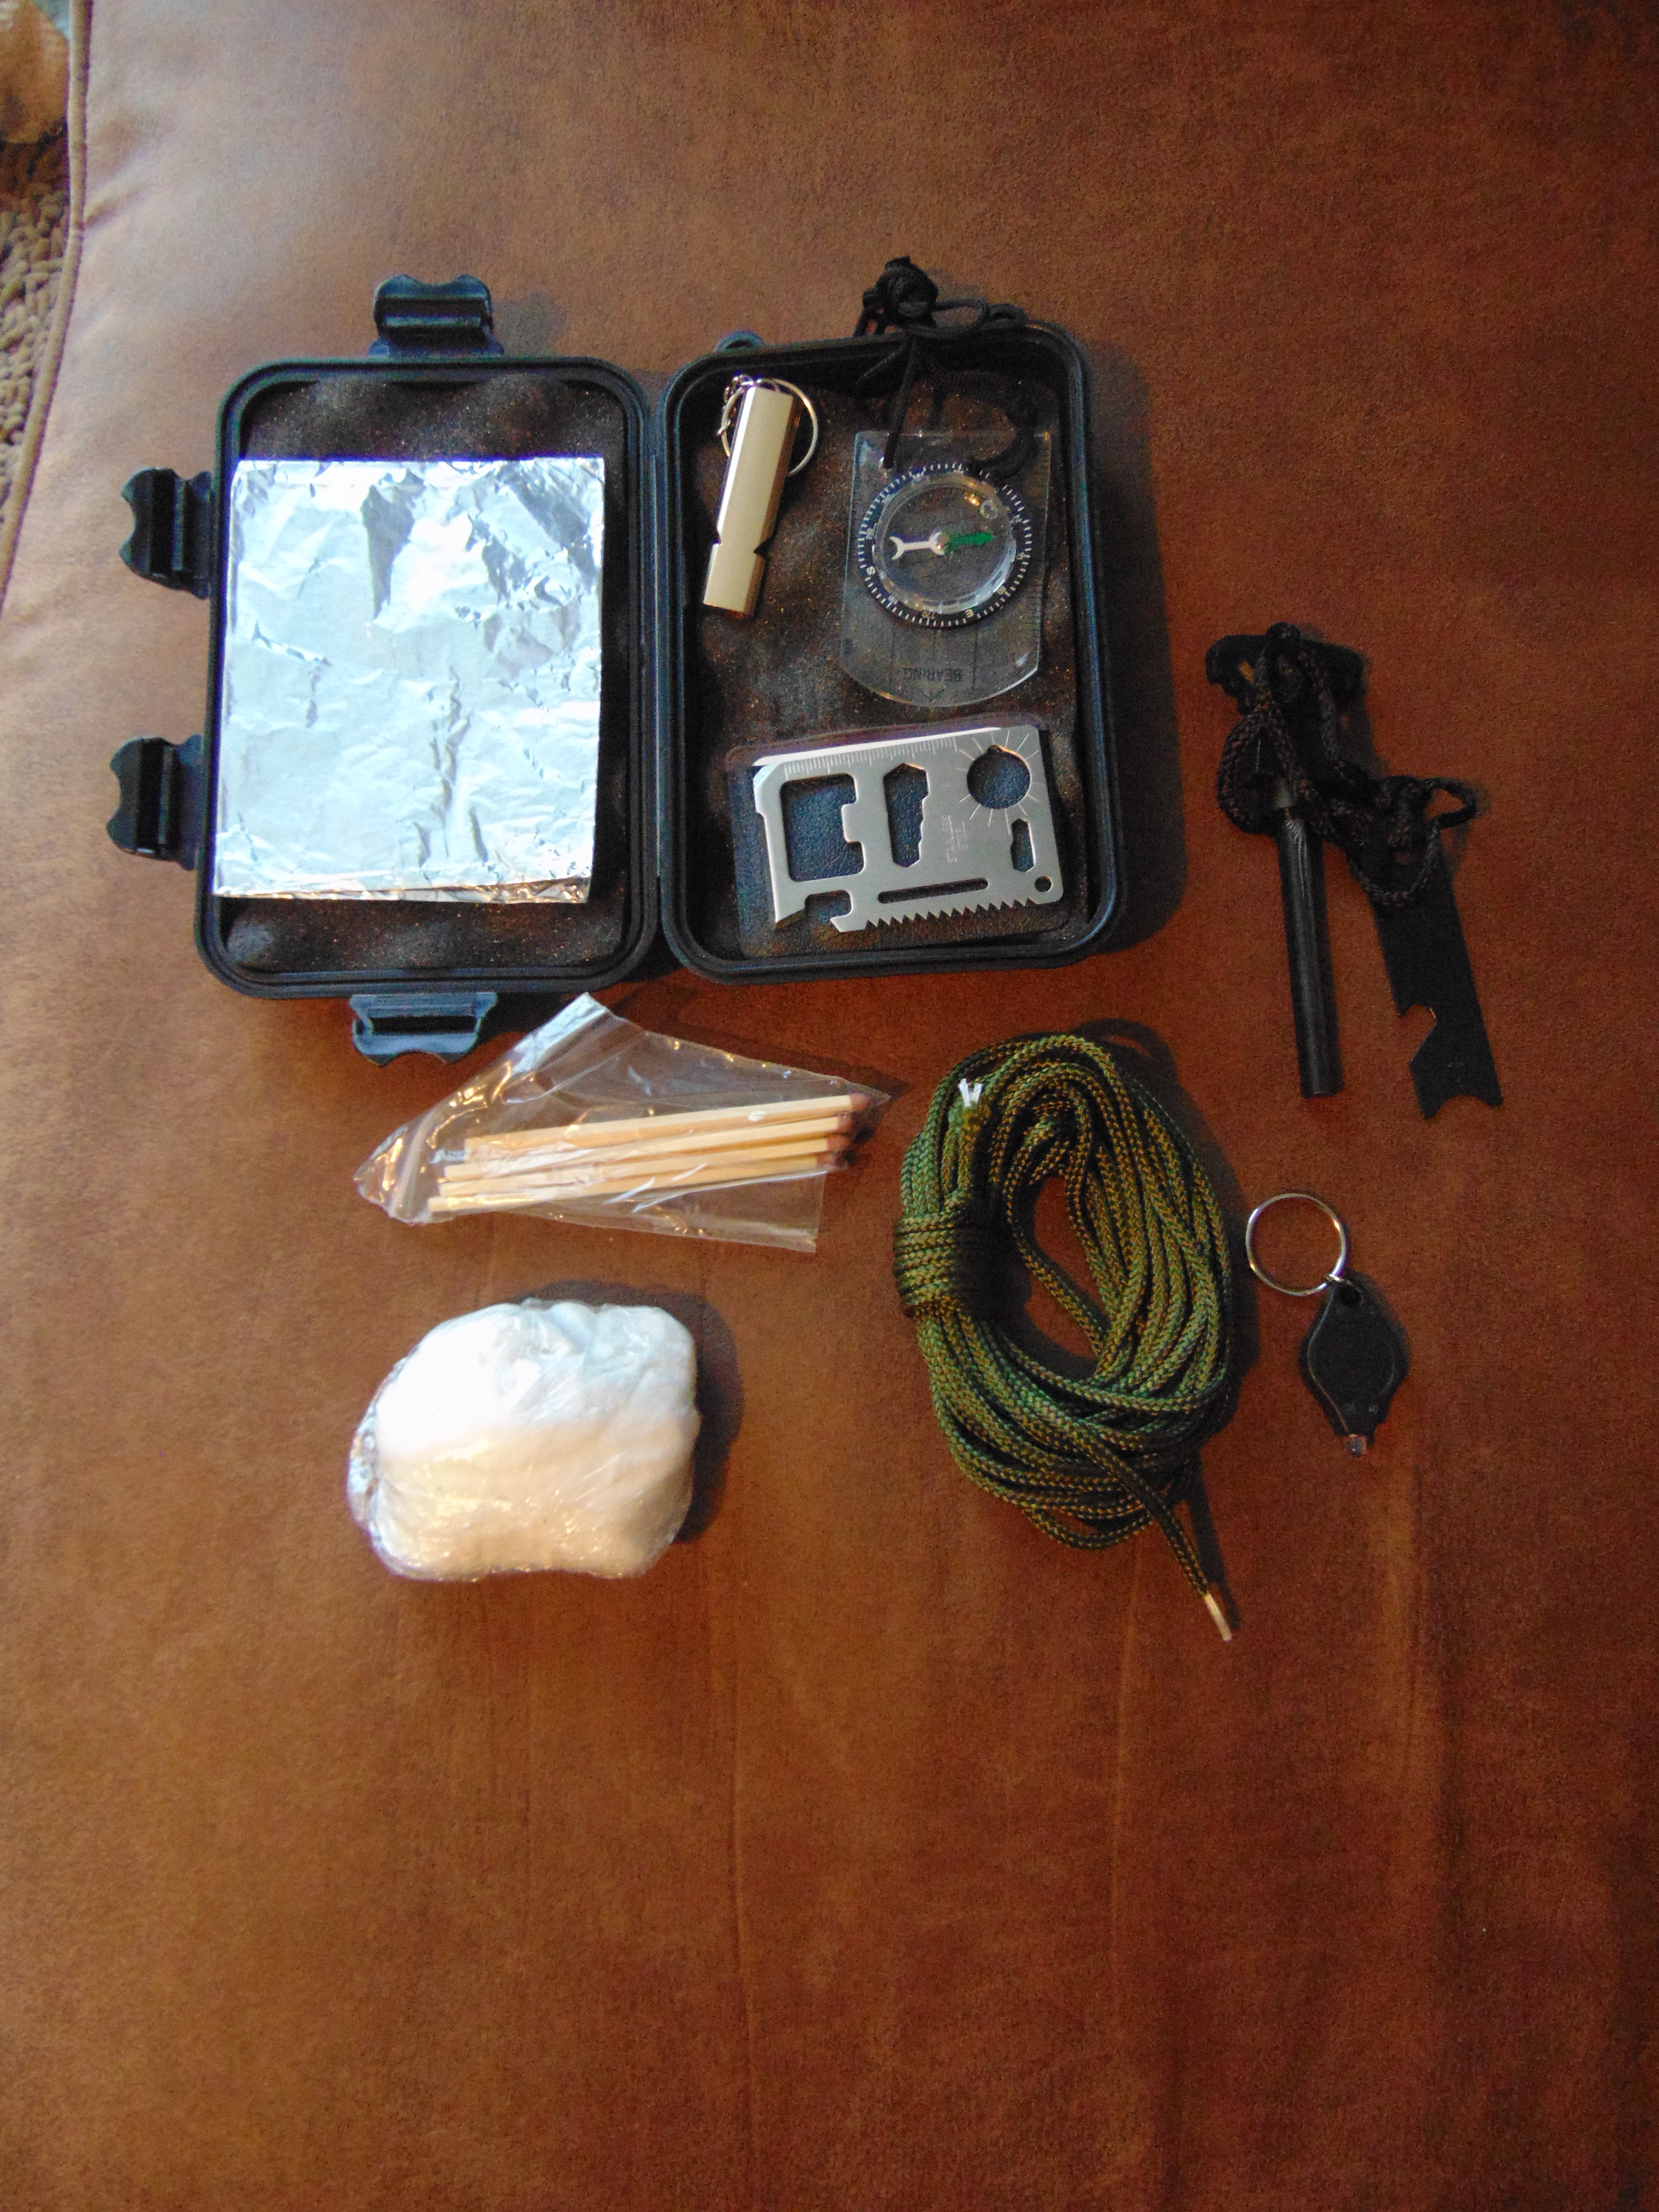
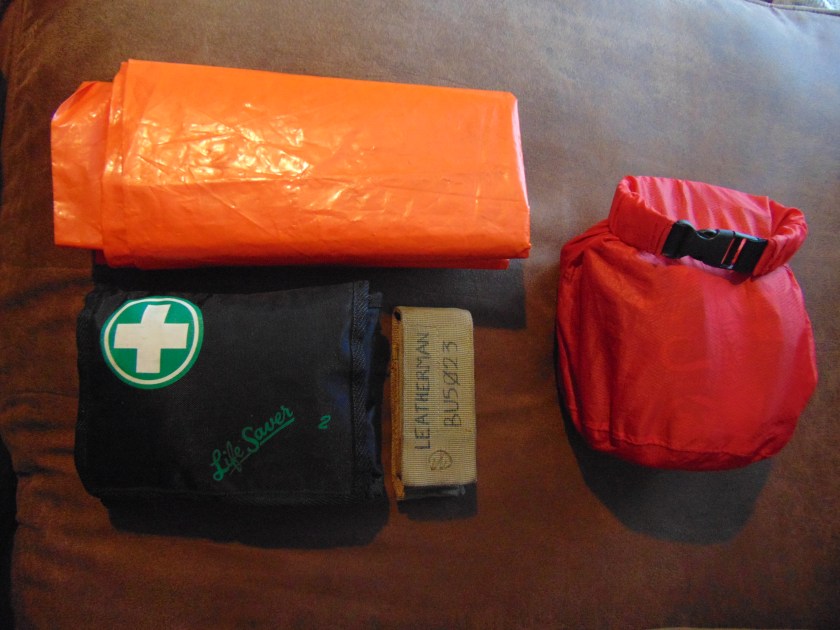
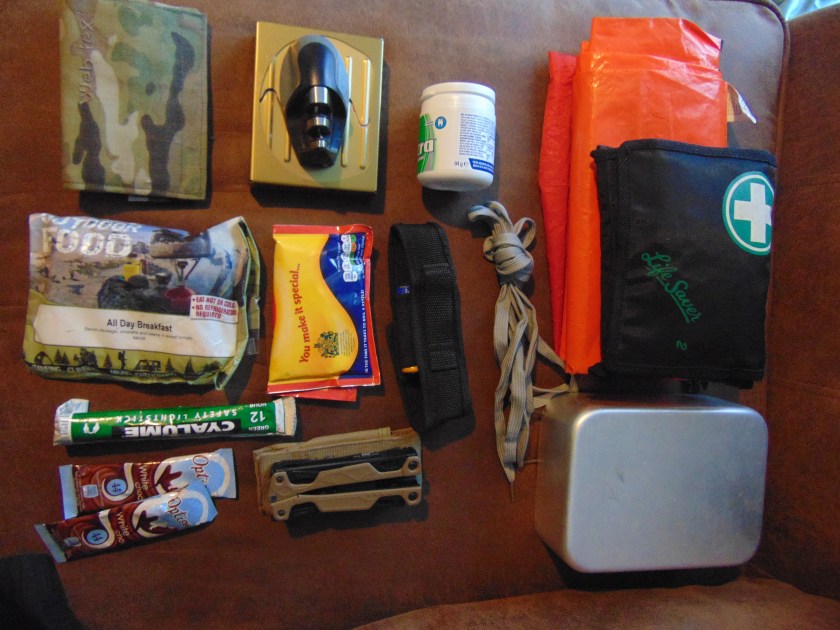
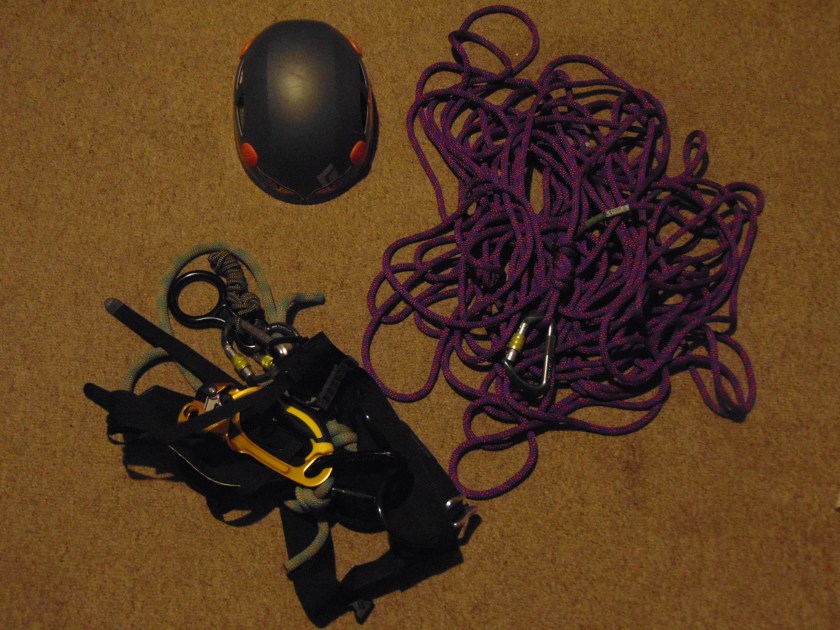
E- Equipment: You must make sure you have the correct equipment for the activities and weather you are going to be experiencing on any day. Be this a full climbing rack for a day of rock climbing, a partial rack for an intended scramble, winter kit for a trip in the snow or even just some lunch and a set of waterproofs.

F- First aid: having a fully stocked first aid kit and knowing how to use it to help yourself or other people on your climbing team. Your kit should have the correct things in it for the people you are climbing with, especially if you are leading the trip. You never know but one day your skills may be needed for someone else on the mountain, someone you’ve only just met who’s had an accident and life could be dependant on your skills at first aid.

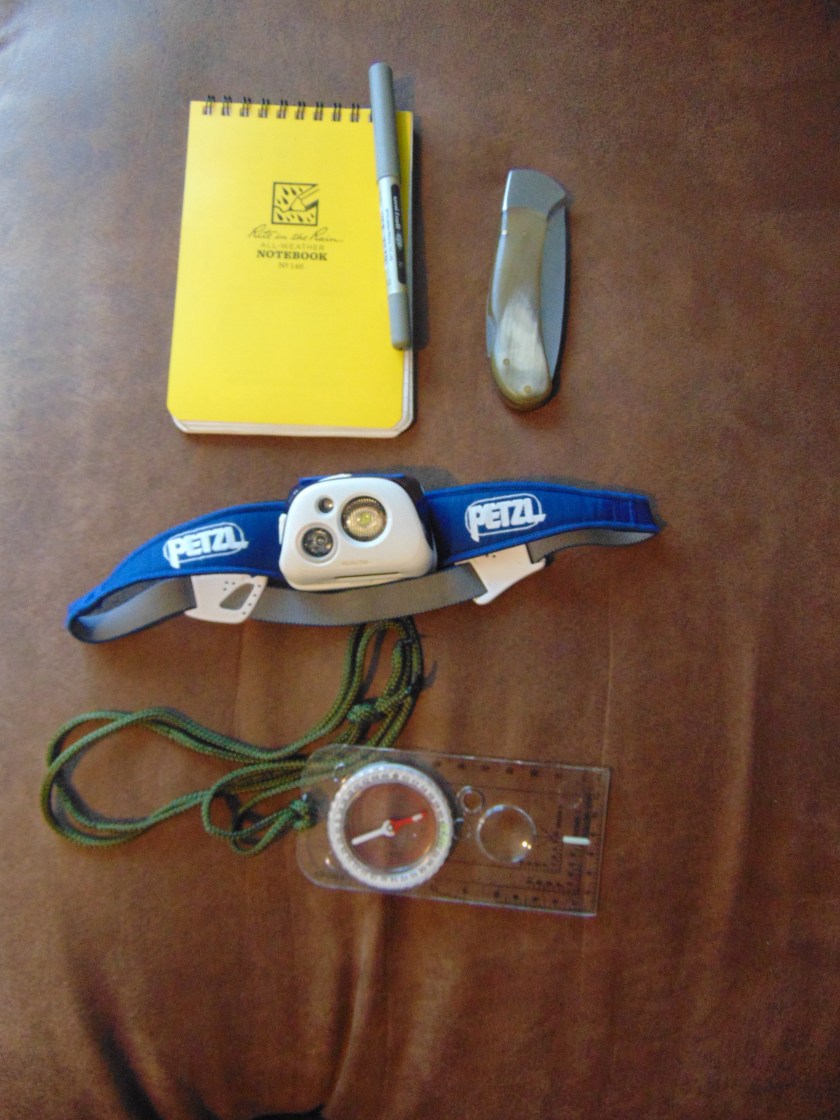
G- GPS: while for some people this is not an essential piece of kit to take on a trip up a mountain it can make life a lot easier especially in rubbish weather or after a long climb when you’re tired and just need to quickly get a fix on your position so you can work out where to go next.

H- Help: knowing when to ask or call for help, before it gets into a life or death situation, this is essecntial not just for your safety but also in an extreme circumstance that you don’t put any rescue service personnel’s life at risk. It is well known that there are ‘bold mountaineers’ and ‘old mountaineers’ but there are not any ‘old and bold mountaineers’ If you need help, then ask for it!

I- Injuries: you should know how to recognise different injuries that could occur in a mountain environment and how to deal with them when they occur.

J- Jumar use: the use of an ascender to move up a fixed rope, be that while big wall climbing or moving up a mountain attached to a fixed rope, these can also be used for rigging tentioned ropes or rescues.

K- Knots: A good mountaineer knows many knots, how and when to use them and the correct knot for the correct job. At some stage in the near future I will make a post about different knots, how to tie them and when they are needed.

L-Leave a copy of your route: Just in case something goes wrong, so people will now where to start looking for you, this is especially essential if you are venturing out into the mountains by yourself.

M- Maps: knowing how to correctly use a map, this means always carrying one with you, no matter how easy the route is. It is also good practice to keep it attached to something in a waterproof case, I  normally attach mine to my bag. this means it will not get wet in the rain and snow and also will not blow away if the wind picks up.

N-North: knowing which way is north, this is map reading 101, knowing where north is means you can orientate the map in the correct direction so that things like taking a bearing are all correct,

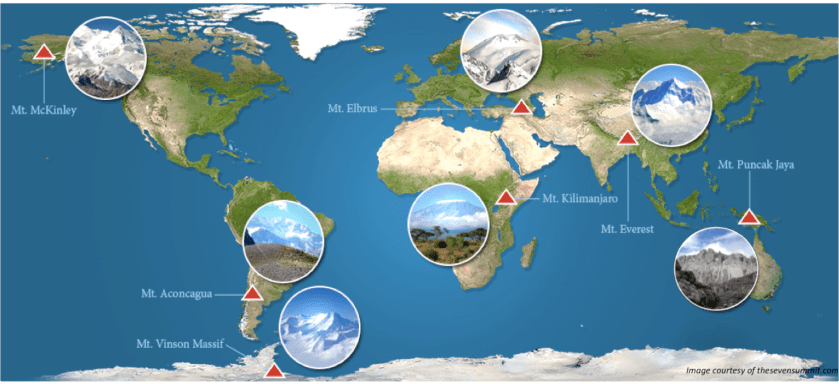
O- Oxygen: Important to every day life but especially important to mountaineers. Be this things like how the thinner oxygen at altitude affects your brain and the way it processes decisions, or even while climbing at very high altitude where oxygen is lacking and supplemental oxygen is all that stops you getting into trouble on the summit.

P- People: Tell other people where you are going and when you plan on getting back, this goes well with L. Also while on this route, be polite to people that you meat while out on a mountain as they love being there just like you do.

Q- Quickdraws and runners: These are a way of attaching the rope you are using and attached to to the rock face, be this while climbing, or even something like short roping on a scramble that may need protecting. Knowing what length quickdraws to use to use is just as important as being able to place them one handed with either hand.

R- Rope work: Knowing not just how to use a rope, for things like confidence roping, rock climbing, scrambling and even moving together over things like crevasse fields, but also knowing when to use it, when it will be a help or a hindrance, is also important.

S-Snow: Knowing what to do in large amounts of sno, how to walk oin it, both going up and down a mountain, how to use your crampons for things like kicking steps while ascending a steep slope, or how to use your ice axe for walking up and down slopes of varying gradients and like everything when using these things will be useful or a hindrance again.

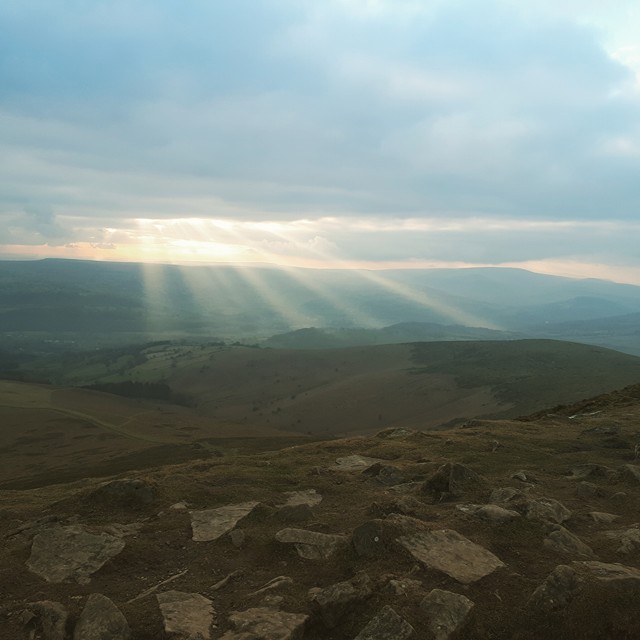
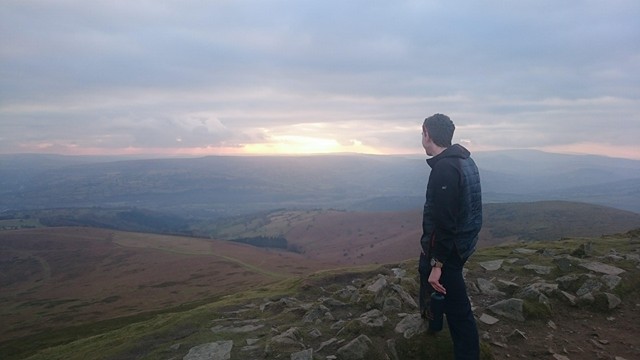
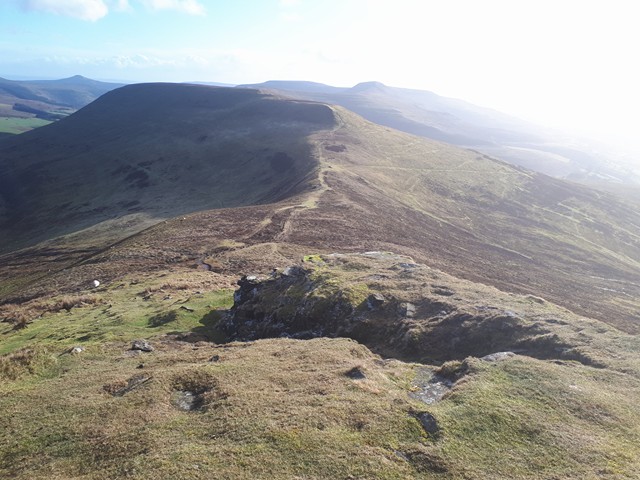
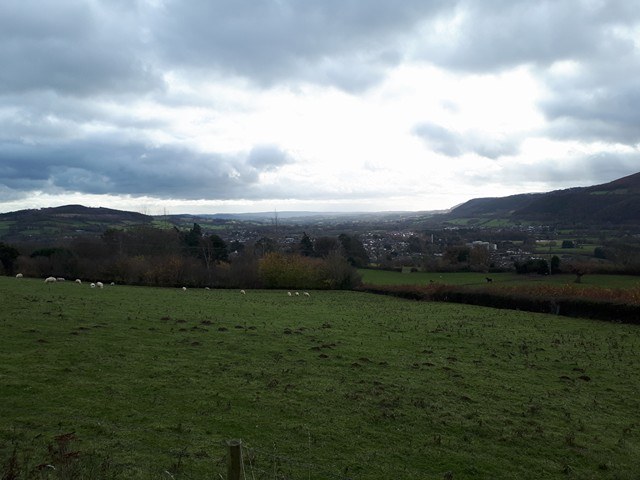
T- Turn around: This point comes in 2 stages. Stage 1, periodically turn around and stay familiar with the route you have already walked up, this is essential as in adverse weather conditions it will be essential to know your route backwards as this may be the safest way down. Stage 2, Turn around and look at the view! All to often people are to engrossed in where they are going, always looking up at the summit, that they forget to look at where they have been, people might say that it doesn’t matter as they will see this view on the way back down, but on the way down people are normally to tired to be paying much attention to it so why not look on the way up and enjoy the whole day this way?

U- Understanding: You need to remember that you don’t own the mountain, and while it may feel like the right thing to do to recommend someone does not climb in the current conditions, they may have more experience than you and may feel safe and confident even when you don’t. You can advise them but you do not have the right to stop them climbing.

V- Visibility: knowing which you should be heading is essential on a mountain. While this may seem simple and like I’m teaching you to suck eggs, believe me when out in bad weather, or even at night it is very easy to take a wrong turn or walk in the wrong direction. Take advantage in bad weather, especially when climbing in fog or in low cloud, of any break in the weather that will give you the chance to take a look around you and work out where you should be heading.

W- Weather: knowing what the weather is forecast to do for the day, when sun rise and sun set is, what approaching weather fronts may look like and what that really awesome cloud formation coming your way means for you.

Y- Y anchor: Used for securing a rope while rock climbing or for rigging an abseil. This can be an essential, life or death skill to know if you need to retreat from a rock climb or for getting off the side of a mountain by the quickest route, while this may not be the safest route it can some times be the safest best option. This is another setup that I will demonstrate at some stage in the near future.

Z- Z pulley system: This is an essential skill for rescuing someone if there is a chance of anyone falling into something (crossing a crevasse field for example). Again I will demonstrate this one at some stage too.


You may notice that I dont have anything for X, the reason for this is really simple, after 4 days of thinking and asking a few people, none of us could come up with anything for X at all. If you have any ideas i’d love you to leave me a comment and let me know, you never know, you may see your idea appear on here.


cheers guys.

Matt

Latest Adventure in the Brecon Beacons

So yesterday was the day!

I finally got back into the mountains that mean so much to me. I took my partner up the Sugar Loaf mountain just outside Abergavenny on the edge of the Black mountains. It was her first time up any form of British mountain and she loved it!

The day started off with a really promising weather forecast and as we started up the mountain the sun was out and it was promising to be a nice day.

24203756_1582636781774386_162438859_n

As We got steadily higher up the mountain the weather started to change a little as the wind picked up. As we got to the top it started to spot with a bit of rain but not to much. As we climbed higher and got closer to the summit we decided we would take a slight detour and traverse around the rocks at the top and approach the summit from the North East instead of the south as that meant climbing up into the wind rather than climbing up the last few meters with the wind blowing against us. Thinking that Abby was inexperienced in this kind of weather I deemed it the safer option. As we crested the summit into the fairly strong winds we decided that to stay for to long was a bad idea so after the obligatory summit photos we descended to the base of the rocks just bellow the summit out of the wind to take some more photos and eat our lunch.

24169697_1582636768441054_429104944_o

On the descent, once again because of the wind we decided to walk around the side of the summit and come down in the lee of it so we would be out of the wind on the steepest part of the descent and then walked off via the same southern spur we had gone up by.


All in all this was a very successful day for the 2 of us and it served to reinforce a few very important lessons:

  1. Never go into the mountains with someone that doesn’t want to be there.
  2. Be aware of the weather and, especially when on exposed summits, the wind as it only takes a moment to slip, be knocked off balance and fall.


This trip also served to allow me to try out one of my newest pieces of equipment a new 45ltr day pack. (reviews of this will be coming shortly after I have tried it out another couple of times) For now however I was very impressed and happy with it.


Cheers guys talk again soon.

Plans for the future

Evening Folks


Once again sorry its been a while since I last wrote it’s been a hectic couple of months at work. Just thought I’d put this short post up about my future plans and in doing so, it should give me a little kick to get me started.


Most of you will remember reading about my climbing partner Owen who died in the Cairngorms in February. We planned on starting our bid at the Seven Summits and in doing so prove that anything is possible if you give it enough time and dedication without having to pay out of our life savings for guides and to be helped up, the dream being that we could do all of them as much as possible under our own steam.


Well I’m pleased to announce that even with Owens untimely loss myself and the small team we had assembled still plan on doing this, at the moment there is only 2 of us we are looking at either adding on another few people to complement us on all of our climbs or adding on people for the individual mountains.


Now first I guess I should go into some detail about the seven summits, what they are, the order we plan to do them and the techniques and strategies we will be employing to climb them. First in this article I will go into some details about the mountains themselves and give some brief details of the plan.


As all of you I hope would know there are seven continents, as most of you would have realised by now the seven summits are the tallest mountains on each of these continents, in no particular order these are Mount Elbrus, Mount McKinley, Mount Vincent, Mount Everest, Anconcagua, Mount Kosciusko and Mount Killimanjaro.

7-summits

The order me and alex plan on doing them is as follows. Elbrus, Killimanjaro, Anconcagua, McKinley, Vincent, Everest and finally Kosciusko, the reason for this is we will do the 2 that are easiest to get to and some of the least technically challenging first, followed by the expensive and technical ones and finally ending with a nice easy one which although it is in Australia (on the other side of the world) is the easiest of them all and when we drag our battered and bruised bodies over the summit ridge we can have our families, friends and loved ones there at the end of it all to celebrate with us.


Following this, and I will do my best to make it about once a week there will be regular updates on the mountains, the routes, the equipment, the techniques etc. As both a way of keeping our, hopefully, growing fan base up to date on the plans and also as a way of centrally keeping all our research and planning in one easily accessible place.


One final thing from me before I go. I know that some of you must think I ‘m mad and why would I want to do this? Well first there is the fact that me and Owen put ages into both planning and dreaming about climbing to the highest places in the world. Also to go with this it is going to be done partly in honour of the way Owen used to believe in people and believe that with the right effort and in the right way with the right experience, that mountains were open to everyone. This last point is a key reason for me putting all our planning in one place open to the public.


cheers guys!

Burf

Recent Adventures

Hi guys,


Sorry its been a while, I’ve been very busy at work. So here is the first of a couple of posts for the evening


Three Weeks ago Me and a friend spent a week hiking and mountaineering around the Brecon Beacons area of South Wales aswell as parts of the Shropshire Hills and the Long Mynd. (photos to follow)


First up the time we spent in the Brecon beacons was crowned with two major ascents, the first one, on one of my favourite mountains, The Sugarloaf mountain near Abergavenny, now this ‘mountain’ isn’t technically a mountain, it misses out on that status by a pitiful 4 metres but it is still one of the nicest mountains i’ve ever been on and afterall, whats 4 metres eh?


We started the ascent relatively late in the morning (around 10am) after a walk through the city we started walking up the southern spur directly up to the summit, once we got nearer we decided to finish the ascent with a small but fun scramble up to the top. While up there we took the obligatory photos and had some food on the top before starting back down. On the descent we headed directly over the top to the north before swinging back east again to descend on the most easterly spur which runs parallel with the route we took on the ascent.

Pictures above show from top left to right: My long standing tradition with the flag of my home county flown for the people I hold dear that I have lost. A ‘selfie’ of me on the summit, with Laura behind me sat having her lunch. Me stood next to the trig point on the summit flying the flag again. Finally Sean stood on the summit with his trade mark smile.


Next up we did a traverse of the mighty Pen-Y-Fan. We started nice and early in the morning and true to form the weather was terrible. We climbed up through the clouds onto the summit and walked along to Fan-Y-Big and then on to the Crybin. After this we started the final ascent to the summit of the largest mountain in Southern Wales. After this we walked across to Corn Du the slightly smaller, more western of the Pen-Y-Fan summits and then did a downhill scramble to pick up the path down the mountain, finally upon getting to the bottom we walked around the base of the mountain back to the town of Brecon to be picked up.

The pictures show the route we took, the first one looking at it from the beginning of the summit ridge, the second one shows the summit peaking through the clouds and the last one shows the route we took, looking back on it from the summit of Pen-Y-Fan.


During the week long trip we also took the opportunity to go for a wonder around the Long Mynd, while not a mountain in itself the scenery was amazing and there was still alot of ups and downs. This is again one of my favourite places to go and if people ever want to go without getting lost and confused please do not hesitate to ask and help can be arranged.


Right guys and girls, that’s all for today i’m sad to say.


Burf

Design a site like this with WordPress.com
Get started